Friday, December 12, 2008

Solution: Photographing Black And Shiny Coins


I have spoken with other ancient coin enthusiasts who have problems photographing coins with black patinas and especially black and shiny patinas. The “noise” is profoundly visually disturbing and looks a great deal like snow on the coin. I think I have made some headway towards resolving the problem. I will share what I have discovered.

First, the noise as I understand is the result of the white points or “snow” being underdeveloped. Consequently we need for the noise to receive more light. I think each person I have spoken with has encouraged me to shoot at f/11. I have opened the aperture to f/5.6 and I get much better results. It occurred to me that if we need more exposure then we actually need to admit more light. The coin is also thin enough that we don’t have to worry about depth of field.

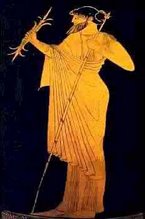
In addition, my Canon XTI has a setting where I can increase exposure time and I did so by a plus (+) 1. I immediately saw better results. The coin you see above left is a very black and shiny coin. I think the coin photo is highly acceptable. I know we have a variety of cameras within our groups and I don’t have the answer to all cameras.

Therefore the responsibility of learning to use your camera falls on your shoulders. I would love to see members who have had this problem give my report a try. If you do and if you discover additional information, please share. It appears the path to learning to photograph coins is a long and arduous one. We are still in the infancy of ancient coin photography and our coins present problems not found with contemporary coins. Thank you for reading and I hope this exercise helps you as it has me.. God Bless.. Jerry.. PS: We have a Coin Photography group at the following URL if you would like to join:
http://groups.yahoo.com/group/coinphotography

Tuesday, December 9, 2008

The Littlest Light Tent Of All


This is the smallest “light tent” I have created and it works great! I call it my “Medicine Cup Light Tent.” I have learned that anything that will diffuse light will enable one to make a good coin photograph. I selected a small, frosted, plastic, medicine cup and the dimensions are as follows. The height is one inch and the width of what became my top is one and 3/8 inches.

I simply cut and removed the bottom of the medicine cup. I must say I was not surprised when I got good coin shots. The cup appeared to have the proper quality to diffuse the light well. By the way, the white covers on the heads of my lights are handkerchiefs. The cup works with the handkerchiefs in place or removed.

I encourage you to give it a try. You may really like the small cup light tent. I should mention that I elevated the coin by placing the coin on a small nut I had handy. Nut as in nut and bolt! Here is a photograph of the cup on the base of my copy stand: http://tinyurl.com/6r55bp The coin you see above is a coin I photographed using the Medicine Cup Light Tent. Please let me know if you try any of my light tents. I have plans for another. God Bless.. Jerry..

Sunday, December 7, 2008

Jerry's 5 Cent Photo Light Tent


I had a terrible time sleeping last night. I was thinking about a simple and inexpensive way to disperse and diffuse light falling on our coins as we photograph them. Earlier in the day I had looked on the web and found a light tent for about $250 dollars. That was terribly discouraging and I knew I could make one just as well. My kids had bought me a tent last year and it just did not work well so I returned it to the seller.

I have spent months working with frosted plastic and fabric with pretty good results. Suddenly I had one of those light bulb moments and it hit me, use paper! I thoughtfully continued to work on the design, as I lay awake for hours. I continued to simplify the “tent” until it was simply a matter of cutting and taping once I entered my studio this morning. Within minutes I had the tent cut, taped and assembled.

I knew it would work and work well. After assembly I chose a couple of coins that would normally present photographic problems. I photographed and you see the results above. I will explain the process in detail although it is very simple.

Cut a sheet of ordinary copy paper to the following dimensions. Leave the paper the length it is, 11 inches. I trimmed the paper to 6” in height. I then rolled the paper into a cylinder and taped it with clear tape. That is it! That is the light tent. I used 22-pound paper. I think 20-pound will work well and I think 24 pound paper may be a bit thick. Regardless, I am very happy with the results and I think anyone can construct the tent in a matter of minutes. By the way, I overlapped the paper by 1 inch and that creates a 3” diameter cylinder. Here is my setup and you will see the tent on my copy stand:
http://tinyurl.com/585mvg I hope the simplicity of this setup is simple enough to cause all to want to try. I would like feedback as to what kind of success you have with the tent. Remember, you have a good tent but you still must get to know your camera. Thank you reading, bookmark and visit on occasion. God Bless.. Jerry..

Saturday, December 6, 2008

More "Milk Jug Photo Box" Efforts


I think the Menander you see above serves perfectly to demonstrate the properties of the “Milk Jug Photo Box.” I purposefully selected the coin because it is less than perfect but does possess the variations of hues, values and intensities that demonstrates how well the little light box works.

I changed my lighting to some degree and added the same fluorescent bulbs to two flex arm lights and placed one light on either side of the box. I really like what is happening and plan to continue to experiment until I have things nailed down. I am still looking for frosted Plexiglas. I would like to create a unit using Plexiglas and I have a few other ideas in mind for that exercise.

Please get your quart milk jug cut to dimensions and get busy shooting coin pics. I want to see what you are doing and I bet you can help me discover an even better way to use our “Milk Jug Photo Box”.. Thanks for reading and I will try to shoot a few better quality coins for those who have asked. The Menander has served to tell me a lot however.

Please bookmark my page and stay in touch.. God Bless.. Jerry..

Friday, December 5, 2008

My Milk Carton Photo Setup


I have had more responses to this article than any other I have written. The following is the URL to a photo of my cluttered setup: http://tinyurl.com/6f9y2m I guess all artists are alike in that we have lots of clutter. It is difficult to see the copy stand my friends and I made. I used my wife’s small Nikon to take this picture. The camera you see in the picture is my XTI with the Sigma 105mm Macro lens.

You may also notice something on top of my camera. That is a small lightweight plastic carpenter’s level I use to keep my lens completely vertical. The lights to the left and right are temporary and I will replace with two lights I have with flex arms. I use daylight fluorescent bulbs from Wal-Mart.

The focus of interest is the small white device on the table of my copy stand. It is simply a one-quart milk carton with the top cut off about six inches from the bottom. I then cut the bottom out of the carton and wrapped the carton with two layers of white cotton fabric. I used clear tape to hold the fabric in place. I placed my coin on top of a one-inch tall section of dowel rod to help avoid shadows.

I then placed the carton down and over the coin, turned on my lights and shot my photograph in aperture priority mode. I plan to arrange my office/studio so I can get to things better. Once I become interested in a new experiment I let things lie where they may. I wish I had more to show than what you asked to see! The setup does not look like much but it really does the job. I am trying to secure a small quantity of frosted Plexiglas and create the same unit from the Plexiglas material. Thank you for asking and thank you for sharing.

I will mention that we have a CoinPhotography group with some really good Photo Scholars. I encourage you to join. You will learn much and we have members from across the skill spectrum. You will feel very comfortable as a member. The URL is as follows: http://groups.yahoo.com/group/coinphtotgraphy Thank you for reading and thank you for the interest. As I indicated, I have had lots of feedback about this article. Your feedback inspires me to experiment and inspires me to share. Please bookmark my site.. God Bless.. Jerry..

Thursday, December 4, 2008

Good Coin Photos: Diffusion Is The Key!


I have been working with my coin photo lighting today and after a couple of years, I realized that until one masters lighting then one is lost. As I was lying in bed last night, I noticed how well diffused the light was that came from the white shade of my bedside lamp. I was thinking of how I could get the same effect. My shade is too large or I would have used it.

This morning I went about the house looking for something that would give me the same results as my lampshade. I found where V had stuck a one-quart milk container in the back of one of the cabinets. I cut the top half off the container, leaving me with the bottom half. I now had the bottom half of the empty milk container. I cut a large opening in the bottom, placed the container over my coin, illuminated each side with two of my shop lights and I now had a “light tent”.

I proceeded to photograph a bright penny and the results were good but I needed more diffusion. I am an artist/pack rat so I was able to locate a nice piece of fabric within my inside studio. I cut the cotton fabric to size and wrapped the container with two layers of the fabric. I then placed the coin on a one-inch length of dowel to achieve some elevation so as to avoid coin shadows.

I placed the open end of the container over the coin, turned on my lights and I knew at once I had the proper diffusion! I shot the coin with my Canon XTI and Sigma 105mm Macro lens and as I shot the coin I ran the EV up and down the scale to make certain I had a good shot. I looked at the results and I am terribly excited. Not a shadow or a reflection! Take a look at the Aretas IV you see above and let me know what you think.

I mentioned the Canon I have. I truly believe one can get great results with a point and shoot camera. I think one needs a macro setting, ISO changer (ideally) at and at least an aperture priority mode. I would look for a camera with a manual setting mode. Remember, one does not need 7 mega pixels! One mega pixel is enough. I have looked on Ebay many times and there are all kinds of bargains to be had with gently used or seldom used cameras. There are many used 3 and 4 mega pixel cameras with the settings you need. Take a look.

I would like to mention that I know I am not the first coin enthusiast to use a milk carton. However, I had tried a larger one-gallon container in the past with poor results. I think moving to the smaller one quart container and wrapping the unit with the fabric is what made things fall into place for me. I am going to try to locate a piece of frosted Plexiglas and create a tent using the Plexiglas material. I can’t get past the aesthetics! Thank you for reading and I hope this article generates enough interest to get you started. Please bookmark my site and return on occasion to see what we are up to. God Bless.. Jerry..


Monday, December 1, 2008

Seal Controversy: Error Made?


I saw the following article in the "Biblical Archiology Review" and I found it to be very interesting. I hope you enjoy as much as I did. There was no credit as to author.
On January 16, 2008, excavator Eilat Mazar announced that a team she is leading south of the Temple Mount in Jerusalem had uncovered an inscribed seal that dated to the time of Nehemiah. She read the name on the seal as “Temech” (tav, mem and het) and suggested that it belonged to the family of that name mentioned in the Book of Nehemiah. Soon after the announcement, however, European scholar Peter van der Veen suggested that Mazar had erred by reading the inscription straight on rather than backward, to account for the fact that a seal creates a mirror image when it used to inscribe a piece of clay. He and other critics suggested that the seal actually bears four letters (shin, lamed, mem and tav) and that the correct reading is “Shlomit,” which itself may be a name mentioned in the Bible. Mazar has now acknowledged that the seal should indeed be read as “Shlomit.”
After reading this article I don't feel as bad about some of my attributions.. God Bless.. Jerry..


Friday, November 28, 2008

Another Great Anode


I can’t seem to stop creating anodes. I have another anode I really love and it works beautifully. I call it the “Center-Fired” anode. The anode is made from ¾” mild steel and 3/16” mild steel. I highly recommend this unit for those using the smaller power sources.
I use a 1.2 (5.2 cups) liter plastic container with my smaller power source so I need for my anode to be about 4” in length. Different containers will dictate different length anodes. In other words you must choose a container and then cut the anode to fit your container. Look at the illustration I have included with the article and you will see the horizontal mild steel bar is ¾” in diameter.

Please observe the vertical mild steel is 3/16” in diameter. If you are using no more than 800mA then you can use a 1/8”diameter vertical piece. I would try to secure the 3/16” however. The vertical rod must rise above your container by a couple of inches. This will make certain you will not have wire in your solution. In fact, I would bend the top one inch of the vertical back and away form the container using pliers or ViceGrips.

The vertical rod is welded to the horizontal rod and it takes about one zap from a MIG welder to do the job. While making up one unit why not make three or four. This way as the anode collects crud one can have one or more anodes in soak. Remember you must determine the measurements so the unit will fit into your container.

What is so great about this anode? First, you do realize the lead is clipped to the vertical piece. When the unit is cranked up and Zapping you will find the coin closest to the center receives the most activity. I like this. As coins become clean you can adjust the coins needing less Zap towards the ends of the anode. I keep my coins moving about as needed.

If I have a rock-hard encrusted coin(s) then I allow that coin(s) to fire near the center. The cleaner the coin, the more I adjust the coin towards the end of the anode. I hope I did not mislead you into thinking this anode is for the smaller units only. I have used the same kind of anode on larger Zappers and fired 20 coins or so very effectively. This is a very sturdy unit and once cut and welded you will have an anode that will last for years with the proper cleaning.

Once you have an anode cleaned be sure and dip in white vinegar, wash with soap, rinse and dry and put aside. Again, the anode should last for years. It is the Sherman Tank of anodes. Click on the illustration to enlarge. Please feel free to ask questions. God Bless.. Jerry..

Tuesday, November 25, 2008

Free: Coin Picture BackUps


Recently two of my friend’s computers crashed. Fortunately they had important data backed up. I have never been one to back up files but the second crash of a friend’s drive got my attention. Shawn, one of our fine members, shared the following site with me and I am passing the information on to our members who want to back up coins pics or other data.

Mozy offers free online backup solutions for the home. One can get a free MozyHome account that allows up to 2GB of online storage. Of course, one can subscribe to more space for less than $5 dollars per month. I like the freebie 2GB. I have done my homework and learned that Mozy is a highly reputable company with state of the art security.

I know nothing about algorithms and password encryption so I have to rely on PC to tell me Mozy is excellent in these departments. Ease of use is of primary importance to me. I was surprised to find that Shawn was correct and that even I was able to download and use without a hitch. You are right so far Shawn. When reviewers begin to talk about elaborate interfaces and the like my eyes begin to glaze over. Suffice it to say the program was easy for me to download and the image appears to be very functional.

I suggest you go to http://mozy.com/ and see for yourself.
If you will share with Mozy that I suggested you take a look they will give me extra space. You will need to know my e-mail and it is as follows: coinstore@comcast.net Perhaps I am being a bit mercenary but I will leave that to your conscious. Either way is great but I will be downloading data that serves our sites. Thank you for reading and please let me know if you use the program and please let me know what you think.. God Bless.. Jerry..

Tuesday, September 2, 2008

When New Is Not Necessarily Better


Have you ever downloaded a “new” version of an older version of software you have known and loved for years only to have it perform poorly or even crash? Wish you had the older version back? Well, help is on the way at oldversion.com.

Downgrade until your heart’s content at oldversion.com which offers almost all revisions of a multitude of common programs such as Internet Explorer, Skype, Google Earth and many more. The programs are free so you can make your selections without any expense.

Please let me know if you try any of the programs and please let me know how you like the results. God Bless.. Jerry..

Saturday, July 19, 2008

Do You Have The Sense To Know Your US Cents?


We had a nice response to our last article concerning the US Cent so we are adding a bit more. I hope you enjoy and we love to get feedback. You can e-mail me at coinstore@comcast.net or you can simply respond online. I hope the following is informative and enlightening.
The cent was made of pure copper from 1793 to 1837.

The cent was made of bronze from 1837 to 1857.

In 1857 the cent was mixed as an alloy of 88% copper and 12% nickel. This continued until 1864.

From 1864 to 1962 the coin was once again changed to bronze.
From 1962 to 1982, the cent's tin content was removed. This resulted in a composition of 95% copper and 5% zinc.

In 1982, the cent's composition was changed to 97.5% zinc and 2.5 % copper and this is what we now call the "clad penny."

Addendum: in 1943, the coin's composition was changed to zinc-coated steel. This change lasted for one year only and was created as a result of the critical use of copper during WWII.

I hope you have enjoyed these little facts and we will appreciate any information you may want to share. God Bless.. Jerry..


Friday, July 18, 2008

A Penny For Your Thoughts


I am seeking the numismatic expertise of members and readers of my blog relative to the US Penny. The penny as currency is pretty much worthless. The copper content of each coin is 1.3 times the value of the coin itself. Environmentalists are calling for a cessation of copper mining. Thus, the outcry to terminate the penny as currency is growing louder.

There are rumors the penny will no longer be minted after 2009. I knew I had a question in here someplace so here it is. Should I begin to buy common rolls of pennies to put back for my grandchildren? If the answer is yes, is there a “better” penny for me to invest in such as the solid copper penny? I have very few US coins and consequently, I am pretty much in the dark.
Please write me at coinstore@comcast.net and advise me if you will. Thank you very much for reading and please bookmark my site. By the way, I hope you like my penny photo.. God Bless.. Jerry..

Wednesday, July 16, 2008

Coin Photography: New Lighting Method


I have been working with my coin photography for a long time now and I have been working with lighting in particular. In recent days I have found a “new” method of lighting that I am very pleased with. The coin on the left was photographed using the new lighting technique.

I have a ceiling fan with a light kit attached in the room where I photograph my coins. I removed the light cover from the fan and inserted a fluorescent bulb in the mount and left the cover off. The copy stand I use is about six feet from the bulb. I have shot quite a few photographs over the past few days and I am very pleased with the results.

Of course, one could use wherever ceiling light fixture one has. Mine happens to be the fan with the light kit. Also, I have one window in the room that faces west and I do get some light through the window when I shoot during the day.

The color balance is good and I am very pleased to this point. I am shooting about f/8 at a very slow shutter speed. I have my camera pretty much locked down so I am not concerned with the shutter speed since I am shooting aperture priority. The depth of field seems to be fine. If interested, give it a try and let me know what you think and let me know what kind of results you get. Thank you for reading and God Bless.. Jerry..

Sunday, July 6, 2008

Transition From The Ordinary To Art


The photograph above is of a "Star Gazer" my wife has. I shot the flower several times and made the decision I accomplished what I wanted with this photograph. I attempted to elevate the subject matter to something more than the ordinary. One could apply the term surreal. Look carefully and you begin to see imagery such as a sunrise and small animals. Also, remain loyal to your taste. I do not ask you to like, I only ask for you to appreciate. I believe it is incumbent on the artist to show his/her world to the viewer. I hope you enjoy.. God Bless.. Jerry..

Friday, June 27, 2008

Patinated Coin: Before And After


A member asked to see one of my coins before and after patination. I had several coins already Zapped and I chose the one you see to the left because I did not mind polishing it a bit. I used my 800 mA power source as opposed to the Pyramid 26 KX. The smaller unit with a smaller container is much more convenient for my patinating needs.

The coin has a bit of pitting and shows up in the photograph. However, the thrust of the article is to demonstrate what can be done using my technique. I Reversed my leads as I wrote about in my last patination article. I placed the coin in the solution for 10 seconds, pulled the coin and rotated the clip to another position.

I repeated three times for a total patination time of 30 seconds. I could have continued with the process until the coin was much darker but stopped at the point I thought the coin would look best. Perhaps I should have chosen a much better coin but this coin suffices to illustrate my point. My e-mail is as follows and if you have questions please feel free to ask. jceaus@yahoo.com I think it is good to ask questions openly so the entire group benefits. Thank you and God Bless.. Jerry..

Thursday, June 26, 2008

Zappers: Patinate Your Coins Using Reverse Electrolysis


About three years ago I developed a technique for artificially adding patina to a Zapped coin and I am sharing with each of you. The technique works best with bronze coins as opposed to copper. I use the method to patinate coins I have had to Zap for long periods of time.
The process is very simple and if you follow my directions you will have good success. First of all, make sure your Zapped coin is clean and devoid of all debris. Next, I want you to reverse the leads to your zapper. The negative lead is connected to your anode and the positive lead is connected to your cathode.
It is best to work with a “dirty” solution or a solution in which you have Zapped coins. Place the coin in the solution the same as if you were preparing to Zap. Turn the current on and leave the coin in the solution for about 10 seconds. Immediately pull the coin after 10 seconds and rotate the alligator clip to another position on the coin. Otherwise you will have a bright spot on the coin where the clip was attached.
Allow the coin to remain in the solution for another 10 seconds, pull the coin, and rotate the clip again. Repeat this process until the coin is as dark as you like. Once the coin is the value you like then wash with running water and allow the coin to dry. The patinating process may take one to two minutes or even longer using this process but the results can be really great. Give it a try and let me know if you have questions. You can e-mail me at jceaus@yahoo.com One other thing, be sure and return your leads to the normal Zapping position so things will be ready for your next zapping session. Thanks for reading and God Bless.. Jerry..

Monday, June 16, 2008

A Safe Way To Store Your Zapped And Cleaned Coins


This article is for all you Zappers who want to know how to store your coins once they are zapped. This is a question I am often asked. Please read and if you have questions, write me. You can reach me at jceaus@yahoo.com

I am assuming you are zapping your coins as we teach you to do on CoinZappers. Pull your coin from the solution and drop the coin in a small container of white vinegar. You should see your coin fizz for 30 seconds or so. Once the coin ceases to fizz, move to the next step.

Wash your coin in water using a mild dishwashing liquid. I think most all the liquids are mild. Rinse thoroughly and dry with a soft towel.

Place your coin(s) on a window ledge and allow the coin(s) to dry. You may want to place your coin on your deck where it will be in direct sunlight. Turn the coin over at least once while drying. I think a couple of hours in sunlight are sufficient.

If you plan to wax your coin, wax the coin with Ren Wax. The last time I looked Tony and Tom had Ren Wax at commonbonze.com

I suggest a thin layer of wax. The wax can be applied with your finger or with a very soft toothbrush.

You are now ready for storage. I recommend an archival flip made from prolar polyester. Be certain your flips DO NOT contain PVC. I personally like the 2”x 2” size flips.

I hope this information helps. Please write me at jceaus@yahoo.com if you have questions. One other thing, if you are not a member of CoinZappers I suggest you join. We have great members with a vast knowledge of coin zapping. The URL is as follows: http://groups.yahoo.com/group/coinzappers and simply state that Jerry sent you.

Don’t forget about our new group, CoinPhotography. We have great members with a wonderful knowledge of photographing coins. The URL is as follows: http://groups.yahoo.com/group/coinphotography Simply say that Jerry asked you to join. God Bless.. Jerry..

Friday, May 23, 2008

My New "Green" Solar Hot Plate


Should one dry one’s coins after zapping? The answer is yes and I have a very simple solution for drying your coins. I have created what I call my “Solar Hot Plate”. I will call it the “SHP”. Now just what is the SHP and why do I need it? The SHP is an area of metal or plastic painted with glossy black paint and is used to dry coins.
Locate a piece of metal or plastic such as a large lid one finds on a gallon-size container. The bottom side of an empty margarine tub will work really well also. Buy a can of WalMart’s .99-cent glossy black spray paint and paint the surface of your metal or plastic really well with the paint. A couple of coats should cover well and allow the unit to dry for a day or so.
You have now “built” my new fangled SHP! Not rocket science but you will love the way the unit dries your coins. I left my plate on the back deck and the surface temp rose to 120 degrees and higher. You can place the unit on a windowsill or on your deck.
The concept of the SHP is to dry your coins so place your coin(s) on the unit’s surface and allow the coins to dry for an hour or so. Be sure and leave at least 50% of the unit’s area open to the sun. In other words, do not cover the entire area of the SHP with coins. You want the sun to reach at least 50% of the SHP’s surface area.
A quick note. After zapping, place your coins in white vinegar for a few minutes and allow the vinegar to neutralize the sodium carbonate we use in our solution. Next, wash your coins thoroughly with a soft brush, water and a mild dishwashing detergent. Dry with a paper towel and you are now ready to enjoy our new “green” SHP! I think simple things such as the SHP makes this hobby much more enjoyable. I hope you agree.
I bet many will readers will create units much more clever than mine. For example, one could create an SHP oven! Please share with us.. God Bless.. Jerry..

Friday, May 2, 2008

Zapping A "Concrete Crusty" Coin


Hannah, one of our CoinZapper members, asked if I would make an effort to clean the coin you see pictured above. I agreed and as soon as I saw the coin I realized it had a terribly hard crust. There is no way to recover this kind of coin and maintain any imagery without zapping.

Please look at the bottom two images and you will see the condition of the coin upon arrival. I tested the crust and I rarely find coin with crusts as hard as was on Hanna’s coin. I zapped the coin most of the afternoon using my large zapper and my now well-known Bamboo Tools to help prod the crust loose.

From experience I knew the coin would most likely have pitting and as you can see it does. However, the beauty of the obverse especially strikes me. The coin reminds me of a piece of renaissance art. I am reminded of a piece from a frieze that has been exposed to the elements for an extended period of time. I love the character of the coin and I hope Hannah enjoys it. I am particularly open to critiques of my photographs. I enjoy receiving constructive criticism.

I would prefer the cleaned coin images had less of a brassy look but that is the result of having to leave the coin in the zapper for an extended period of time. If you enjoy my blog, please bookmark. God Bless.. Jerry..

Tuesday, April 15, 2008

Lighting Problems Solved?


I am very excited about the results of my lighting research and the results I am getting! I have spent months trying to get rid of "noise" and other problems I have had with my coin photography. I have experimented endlessly. I knew most of the problems I was getting was from the bright spots on the coins. Answer? Return to the basics. I knew I needed diffused lighting and I knew the lack of lay at the source of my problem.

I picked up a piece of frosted Plexiglas a few months ago and I had bought a couple of 5 and 1/2" clamp on work lights from Home Depot or Lowe's and I had these on hand. I had enough bulbs including the fluorescent spirals I had been using. I had experimented with all kind of bulbs. I cut the Plexiglas to the size you see in the photograph above and secured it to the face of the "cans" with large rubber bands. I plan to drill small holes through the can and secure the Plexiglas using a 1/8" stove bolts and wing nuts.

Part of the beauty of what I have done is in the portability of the unit(s). I can hold one unit in place by hand and light from any direction I like. I can clamp the light, one or two onto the shelf you see in the picture or I can clamp one or more lights onto the two vertical posts I made. I can also place the unit on the work surface and use the spring clamp to elevate and shoot across the coin's surface.

I cannot believe how easily I can hold one unit in hand and snap my shutter with the other and not have to worry about the bright spots. I can hold one unit at the angle I want and clamp the other unit in place for a fill light. Please observe the Plexiglas is tightly in place against the light can. I left the lights on for an extended period of time and the fluorescent hardly warmed the Plexiglas. CAUTION: ANY other bulb would present a heat problem.

The bulbs I am using are 13 watt spiral fluorecents. I used my wife's little Nikon 46oo to photograph the setup so the photographs are not the best. Suddenly my Fuji s5000 is much more camera than I ever thought as a result of my new lighting system. I have a friend who wants us to make these to sell. I have not done any research and I have no idea if this has been done before. Regardless, this is all new technology to me. You have the right to make units for your use. This setup works so well that I may let him look into "manufacturing".. Someone may write and say this was done eons ago but if it was I am amazed that I did not know about it.

Please click on the URL's below so you can understand what is going on. The Plexiglas is 1/8" inch thick. I think that is about 3mm. I hope you have questions and I hope you will ask them. I am sure this is terribly written but I am trying to get the information to all. I satisfied my questions well after midnight and I am a bit tired. I will state, without equivocation, that you will like the results of your efforts if you assemble one or more of the units. I cannot believe how wonderfully the unit(s) work. Also remember that you can use a more powerful bulb and a larger can if you like. Please send me feedback. Thank you for reading and God Bless.. Jerry..
More photos:
The following is a mirro finished siver coins I was unable to photgraph becase of the shiny fininsh until I used Jerry's Photo Can: http://tinyurl.com/58bepy


Tuesday, April 1, 2008

Adobe: New And Free Photo Program


The following article has been released by Adobe Systems. I think many of our members will enjoy the latest beta version. I will appreciate feedback. God Bless.. Jerry..

Free Online Software Brings Photoshop Technology to Anyone Taking Digital Photos
SAN JOSE, Calif. — March 27 , 2008 — Adobe Systems Incorporated (Nasdaq:ADBE) today announced Adobe® Photoshop® Express public beta, a free Rich Internet Application (RIA) available to anyone who wants to store, sort and show off digital photos with eye-catching effects. During the public beta period, Adobe will solicit Photoshop Express user feedback on product features and functionality, which will continue to evolve over time. As the newest addition to the Photoshop family line, Photoshop Express has taken much of Adobe’s best image editing technology and made it simple and accessible to a new online audience. Photoshop Express allows users to store up to 2 gigabytes of images online for free, make edits to their photos, and share them online in creative ways, including downloading and uploading photos from popular social networking sites like Facebook.

“Photoshop is trusted technology that has changed the visual landscape of our world. Now, Photoshop Express allows anyone who snaps a digital photo to easily achieve the high-impact results for which Adobe is known,” said Doug Mack, vice president of Consumer and Hosted Solutions at Adobe. “Photoshop Express is a convenient, single destination where you can store, edit and share photos whether you’re at home, school or on the road.”

Simple, Fun and Accessible
With Photoshop Express, digital photos can be uploaded and sorted anytime, edited non-destructively to always preserve the original image, and shared from anywhere, on any Web browser. In a few easy clicks, Photoshop Express empowers anyone to make standard edits, such as removing blemishes and red-eye, converting to black and white, cropping and resizing, and much more.

No experience is required to add special effects that will impress friends and family. In keeping with its one-click approach, Photoshop Express offers tricks like Pop Color which selects an object in an image, mutes the background color of the photo and allows the user to swap the object’s color so it jumps off the page. Sketch effects help photos look like drawings and the Distort feature allows you to distort facial features or objects within the images for a comical or artistic effect. Even users with limited photo editing knowledge can simply select what looks best from a line-up of sample photos with visual hints showing different variations of the added effect.
Photoshop Express offers a variety of creative sharing options, including uploading and showing off photos and slideshows in your own online “Gallery” hosted by Adobe, or conveniently embedding or linking photos to social networking sites and personal blogs without having to leave the application. Slideshows never looked better with animation that makes photos float and fly across the screen, allowing for viewer interactivity and unique presentation styles.

Adobe Photoshop Family
Adobe Photoshop CS3 and Photoshop CS3 Extended are at the heart of the Photoshop family, joined by solutions for users at every level who want to bring out the best in their digital images. Photoshop Lightroom™ addresses the workflow needs of professional and serious amateur photographers. Photoshop Elements provides exciting tools and sharing options for photo hobbyists.

Photoshop Express is the latest step Adobe is taking to leverage the advanced technology that underpins its award-winning creative products and deliver it to new online communities. In early 2007, Adobe also announced the availability of Adobe® Premiere® Express, an online video editing and mash-up tool on partner sites such as MTV and Photobucket. Adobe Premiere Express leverages the functionality found in Premiere Elements, a fully-featured desktop video editing program.

Free and Available Now
Adobe Photoshop Express beta is available now for free via any Web browser at http://www.photoshop.com/express . Photoshop Express was created with Flex, Adobe’s free, open source framework for building RIAs. Flex applications provide a consistent, rich user experience across operating systems and all major browsers, including Firefox, Internet Explorer, Safari and others. An Internet connection and an up-to-date Flash® Player 9 are all that are required to experience Adobe Photoshop Express. In its early phases, Photoshop Express is available to US residents-only in English. Users may experience slow performance if accessed outside of the US. Future plans include availability in other languages and countries.

About Adobe Systems Incorporated
Adobe revolutionizes how the world engages with ideas and information - anytime, anywhere and through any medium. For more information, visit http://www.adobe.com/ .

Tuesday, March 25, 2008

Nice Photo Trick For Coin Photographers


I have a really tough time shooting shiny coins and I will share a tip with you I learned a long time ago that helps. There is a very cheap hair spray (I assume it is still around) called AquaNet. I probably bought AquaNet because it was very cheap! Other brands of hairspray may work just as well. Regardless, mist your shiny coin with the hairspray until the surface of the coin turns "flat." Flat, means there is no reflective quality.

Once the coin is photographed then it is a very easy chore to wash the hair spray from the coin's surface with water. I don't think the hairspray would harm the wax on the surface of a waxed coin. The next time you encounter a coin that is giving you a great deal of reflection then please try and let us know how this trick works for you.. God Bless.. Jerry..

Friday, March 21, 2008

Coin Photographers: Don't Break Your Bulbs!


I recently saw or read that a family member broke a fluorescent bulb in their house and the cost of calling in a hazardous cleanup crew to get rid of the mercury contaminant was $2000. I know many of you use the fluoresents as a light source for your coin photography as I often do, but I had no idea the potential contamination was considered to be so serious.

As I began to search for the degree of potential danger I encountered the following article: http://tinyurl.com/yr5gjb What do you think or know? Here is another article I think you should read: http://tinyurl.com/2skf86 I am sure there are already millions of the bulbs in use and we will probably hear much more about the potential hazards. I hope we have a few Bulb Gurus who can , forgive me. enlighten us! Thanks for reading and God Bless.. Jerry..

Sunday, March 9, 2008

Why Do I Continue To Get Photo "Noise"


If I understand the digital photography term "noise" properly, I think this is one of my coin photography problems. I have noticed that when photographing my very dark and very light coins I get a visually garbled appearance. One solution I have tried with some degree of success is to soften the light by using layers of cotton material placed over my light(s). I would love to get feedback from all about this problem. If you have the same problem or if you have a solution, please share with me/us.

I use the Fuji S5000 to shoot my coins and I think I get some really good results with the exception of the situation I just mentioned. Fuji has just released a new point and shoot model that may possibly be the solution to my problem. The camera is the Fuji FinePix F100fd. The blurb I read spoke of digital cameras that blur a scenes brightest colors. Of course I am sure they are speaking of white and black as colors too.

Fuji's new P&S extracts more digital information from brights and darks and provides a wider range of values. The concept sounds great and I am excited that this may be new technology for all digital cameras. I think the camera is a bit on the pricey side at $380 at: fujifilm.com I am sure the prices will fall rather rapidly as most new digital cameras do. I am really excited about the new technology but that is as much as I know.

I am not in a position to know anymore than I am reporting at this point. I will try to call Fuji and see what else I can learn. Under no circumstances am I recommending the camera. If someone does purchase the camera or has purchased the camera , please share with us. I would also love for you to join our new CoinPhotography group and share with us. Of course you may be a complete newbie and that is fine too. Our URL is as follows: http://groups.yahoo.com/group/CoinPhotography You have a standing invitation to join us. Thank you for reading and I look forward to your feedback.. God Bless.. Jerry..

Sunday, March 2, 2008

Can You Name And Date The Coin?


I have cleaned a nice silver coin and I would like for you to give me a date the coin was struck please and I want to see if you can name the emperor. Thank you for looking. Please bookmark my blog. God Bless.. Jerry..

Wednesday, February 27, 2008

Please Join Our Coin Photography Discussion Group


We have a great little group going at CoinPhotography and we have attracted several knowledgeable coin photographers. Currently we have a great discussion going about using polarizing filters to aid us in photographing "slabs." I know there are sites where coin photography is taught but we are the only Yahoo CoinPhotography discussion group I know of.

Several of our coin members have shown us great photos they have made using their point and shoot cameras. We cover the entire spectrum of talent. Please consider joining us and please consider sharing with us. I need all the help I can get with my Coin Photography. Come on and break down and get on board. We really need your expertise and there are many of us who need to enhance our coin photo skills. I bet you will enjoy yourselves and I bet you will learn a lot!


We are open forum and all are invited to join. Please consider joining us and reading the posts. We have at least three members who use the DSLR's but I know many are the same and I am! On a budget! I have seen the results of some wonderful coin photos made with sub $200 cameras. The URL is as follows: http://groups.yahoo.com/group/CoinPhotography Thank you and I look forward to seeing you on CP! God Bless.. Jerry..

Tuesday, February 26, 2008

Two Artists, Past And Present, Meet


I finished cleaning several coins last night and I was struck by the beauty of the stag on one particular coin. The coin was in very bad condition and I decided to work on the stag and add an element of my own. I used and older version of PS to help provide definition to the animal. I added an eye and "erased" some of the pitted areas on the legs and body. I gave greater definition to the head and removed all reference to what was a coin form and partial legend.

I wanted an element that was uniquely mine so I added a small pile of rocks and a bush. I enjoyed the exercise very much and hope you appreciate.. God Bless.. Jerry..

Monday, February 25, 2008

Princeton Ancient Coins: Fascinating Article


I stumbled across the following article about Princeton's ancient coin collection and found it to be fascinating. I give full credit for the article to the Associated Press and to the writer, Chris Newmarker. I hope you enjoy as much I did.

Princeton coins are gateway to history
CHRIS NEWMARKER
Associated Press
PRINCETON, N.J. - Alan Stahl has a lot of change on his hands - and not the kind you can cash in at any bank. The curator of Princeton University's numismatic collection is in charge of protecting and displaying tens of thousands of coins, tokens, medals, and pieces of paper money.
"The funny thing is, I've never owned a personal coin collection," said Stahl, 60.
The 150-year-old collection started as an assemblage of plaster casts of ancient Greek and Roman coins. Stahl estimates it now contains about 80,000 items.
New acquisitions in the past year have made the collection even more diverse: a donation of 2,000 ancient Chinese coins, and the purchase of more than 800 medieval Greek coins, bought for hundreds of thousands of dollars.
About a dozen university students each spend a few hours a week cataloging the coins. So far, the collection's online system has more than 3,000 coins listed, about 1,000 coins entered in each year.
"At this rate, we'll be done in 50 years," Stahl said.
For the students, cataloging the coins is an education in itself. As a junior majoring in classics, 21-year-old Joe Codega has read a great deal about the ancient Romans.
But he felt a greater connection with the subject he loves last week as he held a brass coin with the image of the big-chinned Roman Emperor Nero on the front. The back showed Rome's temple of Janus with its doors closed - a symbol that the empire was at peace.
"It's neat to be able to hold something that an ancient person held," Codega said.
Some of the collection's coins are on display at Princeton's Firestone Library, where the collection is housed.
Any member of the public can also ask to see a tray with some coins, though Stahl will keep close watch to make sure coins don't go missing. Stahl still cringes when he recalls a theft at the American Numismatic Society when he was there in the late 1980s.
"I'm pleased to say I wasn't the person handing him the trays," Stahl said.
Half of the collection, about 30,000 coins, comes from Princeton University archaeological work in Antioch, in what is now Turkey, during the late 1930s.
The dig turned up a trove of ancient Greek, Roman, Byzantine and Islamic coins. Stahl still handles envelopes with the handwriting of the lead archeologist's wife, who catalogued the money.
"Sometimes I can see where she scraped just a little to bring up a mark for identification. We wouldn't do that today, but I can see her rationale. I do feel a certain kinship to her," Stahl said.
The collection includes Byzantine coins that are bent, almost in cup shapes. Some of the ancient Chinese coins are shaped like knives and keys.
But for the most part, the coins are round and flat - a feature Stahl guesses might be due to functionality.
"The knife coins would sure punch a hole in your pocket or purse. I guess a square coin would be bad," Stahl said.
Stahl first became interested in coins in the early 1970s while studying for his doctoral degree in medieval history at the University of Pennsylvania.
Kingdoms and empires, Stahl said, usually have rulers on the front of their coins, though the Byzantine Empire also used Jesus. Republics in history have avoided living people, and instead concentrated on symbols of what is valued by the state.
Particularly in the past, most average people didn't see their country's capital and its public buildings, or the nation's important documents. But they did see coins.
"Virtually every person is exposed to the coinage of that country," Stahl said.

Again, I hope you enjoyed the article. Thank you for reading and God Bless.. Jerry..


Saturday, February 16, 2008

A Broken Licenius: Found Art


How little we see! The old adage, “Many people look but few people see is so appropriate with this old and broken Licinius. The coin had lain around my coin cleaning area for months until I noticed the coin for the first time today. I should rephrase and state that I really “saw” the coin for the first time today.

I was struck by the gentle and very feminine contraposto of the figure on the reverse. What a wonderful work of art. What a lovely piece of sculpture, rendered by an unknown artist hundreds of years ago. How easily we relate to the female figure and we immediately feel a kindred spirit with that ancient artist.

Intuitively he/she knew the drapery on her arm was repeated in the curvilinear position of her body. That was not taught then and it is not taught now. One either feels the presence of the repetition of figurative line or one does not. Art is not taught art is our Spirit and transcends the ego. We can only experience.

Many years ago nature intervened and we can only guess at why the coin is broken. It really doesn’t matter. The same curvilinear quality we see in the figure has been repeated in the broken edges of the coin and nature adds a new dimension to the rhythm of the line! All the visual the elements come together and we have a wonderful piece of sculpture and art.

In stark contrast, the obverse provides us with the rectilinear head of Licinius. Bold and not so gentle. We are aware of a strong and dominant personality. We see the countenance of a warrior. His portrait is counter to the poise of the youthful, beautiful and gentle female we see on the reverse.

I am very pleased I wiped this coin clean and I am very happy to have it in my possession. I can enjoy the aesthetic moment until I tire of the coin and then I will pass it on to someone else but only if they enjoy the “Found Quality”.. Thank you and God Bless.. Jerry..

Black And Decker Rotary Versus The Dremel


Many members in my groups have asked me about a rotary tool. I am sharing the following with the expectation readers will save money and get more for their money. As an ancient coin enthusiast, artist and a sometime handyman, I have concluded the Black and Decker RTX-B I purchased several months ago is heads and tails above the Dremel units in terms of price, performance and power.

The B&D RTX is a 120 volt 2 amp unit with three speeds. The speeds are: 12,000/24,000 and 30,000 RPM. The unit uses all the tool accessories made for Dremel and has a flip lock system for securing the collet while changing accessories. I love this little feature. The B&D unit fits the hand really well and is very comfortable to work with. I can easily hold the unit as I would a pencil, a pocket knife or if I need real leverage I can hold it like a baseball bat.

I own four rotary units and the other three are Dremels. The oldest Dremel is about 35 years old and I can't complain about it. It is powerful and has never given me one moments trouble. I have all the power I need with the older Dremel as with the new B&D unit. I have had the Black and Decker for close to a year and I really like the power it gives me for the money.

I paid under 30 dollars for the unit at WalMart and would buy another.

Then RTX-B comes with a drum sander only. However, there are kits that cost much more and with many more accessories. I think I will rank this one as I would a coin and give it a VF+. Please do yourself a favor and buy the unit I have described. You will thank me. I would love to get feedback from you if you do purchase the B&D. Thank you and God Bless.. Jerry..

Friday, February 15, 2008

New Coin Photography Group Created


I recently created a new Yahoo group called "CoinPhotography". I have been developing my coin photography skills for at least a couple of years now and still have some distance to go. I think digital coin photography is still in its infancy and I know I need lots of work in this area.

We now have 40 members with 19 members joining during the past week. I welcome each of you to join us. I think this is going to be a great group and I feel really good about things. I know the need is there. Just go through the ancient coins on EBay and take a look at the photos. Most are very weak, indeed, with some exceptions. I am no Ansel Adams but I do know design.

If you are weak as I am please come and learn and if you have good photo skills please join and share with us. One thing for sure, you will be welcomed regardless to skill level. Thank you for reading and I look forward to seeing yo at CP. The URL is as follows: http://groups.yahoo.com/group/CoinPhotography God Bless.. Jerry..


Monday, February 11, 2008

Reverses: I Find Them Very Interesting


I was zapping coins this evening and encountered three reverses in pristine condition. I find coin reverses to be vastly more interesting than obverses. The Obverses on the three coins are equal in clarity. The coin in the center is of particular interest to me visually. There is an "emblem" in the exergue I am not familiar with and I hope someone will share with me what the image is.

Please look to the right of the "DSIS" and you will see what looks like a childlike drawing of a sunrise. Someone will probably tell me this is a very common item on Roman reverses. I am intrigued though. I am a coin cleaner and not an attribitor as most of you know. However, I feel I am getting better. At age 68 I am getting a late start but I am excited about learning.

Look at the Victory left (middle coin) and you will see remarkable detail. In hand I can see muscalature on the neck as well as curls in the hair. I can see each feather, clearly, in the wings. The line beneath the bust is very clear along with the wrinkles in the neckline of what I will call the dress.

Let's toss in a bit of trivia. Who can tell me what is on the obverse? I need for you to tell me what the person is wearing. It should be very easy to describe. A very cheap way to have my coin attributed! Thanks for looking and God Bless.. Jerry..

Electrolysis: The Kindest Method For Cleaning Crusties?


Please take a look at the accompanying photograph of the Antigonus Gonatus (277-239 BC) and let me know what you think. I saw the crusty coin for sale and thought it had promise. The results speak for themselves. Personally, I think "zapping" is by far the kindest way to clean any encrusted coin. The top left and right photographs depict the coin before zapping and the bottom two obviously depict the zapped coin.

If you would like to learn to "zap" coins please join us at CoinZappers. I would never ask you to quit this wonderful membership to join CZ but I ask that you add us to your repertoire of learning experiences. Each ancient coin group has special qualities and one learns from each group. I love to teach and we will be more than willing to walk you through the zapping process.

You have my personal invitation to join. Simply state that "Jerry asked you to join".. The URL is as follows: http://groups.yahoo.com/group/coinzappers

The invitation remains open and you will meet some of the kindest members on the web. I look forward to seeing you at CZ! Let me know what you think of the process. Thank you for reading and God Bless.. Jerry..


Saturday, February 2, 2008

Natural Patination: A Value Scale


Dear reader I am sharing a photo of three coins I have patinated using my "Natural Patination" process. First I will explain what value is to the artist. Value is the lightness and darkness of an object. Many times value is confused with intensity. Intensity is the brilliance or chromatic strength of an object. We can have a bright red and the brilliance would address the chromatic strength of the object.

Conversely we can have a dark red and we are addressing the lightness and darkness of the object. In this situation we are concerned with the value of the object. Please observe the three coins I have attached to this article. The coin on the left is lighter in value than the middle coin and the coin to the absolute right is darker that the other two coins. I have created a very short value scale moving from light to dark. There are many potential values to the right and left of the scale of the coins.

First of all I was able to add value to the coins by using my Natural Patination process. One can find the article elsewhere in my blog. Next, I am able to halt the patination or toning of the coin by placing the coin in white vinegar at the point I want the coin to remain in terms of value. Obviously, a natural toning will continue to take place as any coin ages. However, we can "lock" a desired value in by applying wax or an acrylic spray to the coin. As long as the coin is not in contact with the natural elements the coin will cease to tone.

If you are interested in the Natural Patination process I developed, please scan my blog and read the article. I will add that patina and patina value is a matter of personal taste. As an artist I deal with values and value choices constantly. As you continue to learn more about the zapping process you will also learn that you have the opportunity to make the same aesthetic choices. I hope this article is beneficial and I hope it helps you as you develop your zapping skills. I always enjoy receiving feedback about my articles.. God Bless.. Jerry..


Thursday, January 24, 2008

Important Information About Photo Fluorescents


This post is especially directed to those who have been following my coin photo teaching. The bulbs I have been recommending from Wal-Marts are no longer being carried by my local store and I assume that is true of all stores. The bulb I speak of is the "Lights of America" Sunlight fluorescent bulb. I have gotten very good results with the bulb but again it is no longer available where I live.

Wal-Mart now carries a GE fluorescent that plays havoc with the color balance on my Fuji S5000 and I assume that would be true of other digital cameras. I could not find a GE daylight bulb at Wal-Mart. However, I bought one of the bulbs and found I had wasted my five bucks! I have busied myself looking for an alternative source and I have found a bulb I like very much. After trying Lowe's and other stores I finally found a bulb at Home Depot.

The name and nomenclature of the bulb at Home Depot is as follows: N:VISION Daylight bulb. Be sure you buy the daylight bulb. I like the 14 watt bulb. I won't get into the numbers but suffice it to say the daylight bulb is as color balanced as any bulb I have bought off the shelf. The bulbs sells for around five dollars. I am now using two lights and I love the lower wattage. I don't get as much glare from my silver coins.

I am still working with my coin photography and I think things improve each day. I Have built a few photo tents but I like placing my white material right on the heads of my aluminum reflector lights. Please take a look at the accompanying photo. I am still not where I would like to be with photographs of my silver. If you find balanced daylight bulbs elsewhere please share with us. The pro photo bulbs are pricey and I think when you have balance you have balance. I think these N:VISION bulbs could very well be called photo balanced.


One other thing. I set up the new bulbs and set my camera to a daylight setting and got the same results I would have gotten from shooting outdoors on a nice clear day. I plan to talk with the people at Wal-Mart in Arkansas and see if they will be stocking the daylight bulbs. I can't imagine GE not making a balanced fluorescent.. thanks for reading and I hope this information helps.. God Bless.. Jerry.. PS: I need help with attributing the posted coin..

Saturday, January 19, 2008

Coin Photography: Size And Placement


A very important ingredient in ancient coin photography is size and placement. Placement pretty much speaks for itself. I think we will agree that a centered coin looks best in a coin photograph. I will address the sizing for the most part. Please observe the photograph above as a reference point. I have three separate photographs of the same coin. I created a different negative space for each coin so we can tell one from the other.

Look at the coin on the left. I have purposely left too much empty space to illustrate how the coin is lost in such a large negative area. Please use a sheet of paper to cover the other two coins on your monitor while observing each coin and as we go through the steps. We are visually uncomfortable as we view this image. I often see coin photographs much wore than the one I am using for this illustrative purpose.

We now move to the center coin. What is wrong with the photograph? Obviously I have cropped the coin until we feel uncomfortable with the photo. Why? I think it is like trying to fit the 300 pound man in a child's chair. It is cramped and does not work visually. Intuitively we seek visual relief from this photo. If it was a painting the same principle would apply.

Now, let's take a look at the composition on the right. Ahh, just right! Why? Because we "feel" it is right. We know we have something that is visually comfortable in terms of the design elements we have at our disposal. There is a "balance" between the positive and negative elements. I hope this is a meaningful presentation for each of you and I would like your feedback.. Thanks for reading and I am open to constructive criticism.. God Bless.. Jerry..


Friday, January 18, 2008

Ancient Coins, Photography And Texture


I am using the coin photograph above to illustrate how texture can be used to effectively enhance our photos. I have taken the exercise to an almost absurd level in an effort to illustrate my principle. Please look at the photo on the left and you immediately see how the negative space (the background) competes for visual recognition with our central subject matter which is the coin. I have chosen a negative area that is not very subtle to demonstrate how the eye desires relief from the complexity of the overall composition.

Now, choose a piece of paper and block-out the highly textured left side of the photo by holding the paper in the proper location on your monitor. Your eye feels immediate relief from the complexity of the composition as it rests on the non-textured right photo. With the textured photo there is conflict and with the non-textured photo the eye finds the calm it seeks and desires.

There is visual conflict even if one uses a heavily textured fabric such as burlap or cotton duck. Also observe that I have used a cool color with a smooth surface for the negative space on the right.

Please try this exercise on your photos and you will get much better results as you learn and apply these simple principles. Please let me know if this information is meaningful to you and if so, please bookmark. Thank you and God Bless.. Jerry..


Friday, January 11, 2008

Coin Cleaners: The Stiffest Brush Of All!


I was wandering the aisles of WalMart and stumbled across the stiffest plastic brush I have ever seen. The bristles are plastic so they should not harm your coin and the brush is a great size. See the accompanying photo above. The overall length of the brush is 7" and the brush head is 2 and 3/8" in length. The bristles measure 3/4" in width.


I have never seen a plastic brush this stiff. The item is called a "Grout Brush" and as I indicated I found it at WalMart. The price is .97 cents. It is large and very comfortable to hold. Please rush out, buy one and share your opinions with us. Thanks for reading and God Bless.. Jerry..

Wednesday, January 9, 2008

See Coin Below: Will A Zap Clean The Coin?


I bought the coin pictured above and took a chance that it might clean up well. I received the coin in the mail today and thought it would be a good coin to use for a demo zap. Please click on the following URL and see the cleanup results: http://tinyurl.com/2azx5x

The coin is a Macedon Antigonus Gonatas 277-234 BC and possesses the kind of character I love to find in a coin. I am quite pleased with the results. The coin has a light texture but it has wonderful detail. The coin would have been very difficult to salvage using any techniques other than zapping. If you like the results and would like to learn to zap please join us at CoinZappers. The URL is as follows: http://groups.yahoo.com/group/coinzappers You will encounter some of the kindest members on the net at CZ and we are willing to walk you through each stage of the process. Just say Jerry sent you. thank you for looking and God Bless.. Jerry..

Thursday, January 3, 2008

Aesthetics In A Malformed Ancient Coin


I was about to stop zapping the little coin you see above since I had other and more exciting coins in the "soup." I took one final look at the coin and began nudging the encrustation with my now famous Bamboo Tool. Suddenly I experienced that "aesthetic moment" I sometimes write about. What a little gem! What a beauty!

It makes no difference that the little coin is misshapen and malformed. We often overlook the beauty in our daily lives. The flash of a redbird flying by or the colors of the leaves as they change. I had almost done the same with this beautiful coin. This tiny coin contains all the elements and principles needed to make it a work of art. It is indeed art. It is a tiny piece of sculpture.

Enough said. I hope you can relate to what I am trying to express. If so, please let me know. Thank you for reading and God Bless.. Jerry..